
The Wood Shelter
The next big infrastructure piece we need at the Singing Horse Ranch, is a substantial wood shelter. Because winter is fast approaching and this entire 4,000 sf house and hot water is heated by a wood boiler – that burns wood to generate heat!

An outdoor wood boiler
For those of you not familiar with wood furnaces or wood boilers, they concentrate and intensify the heat and energy generated by burning wood. Which is then used to heat water, which travels in pipes throughout your house to provide heat (which radiates out from the hot water in the pipes). It also heats the water in your hot water tank – no electricity required.
It is a MUCH nicer heat than a typical furnace blowing hot air all the time, but the downside is it burns a LOT of wood. Unless you live in a heavily treed area, where you have trees dying naturally (dead standing) on a regular basis, there’s no way this method would be environmentally-friendly, or even sustainable.
For us, on 160 acres, surrounded by forest, we can’t even utilize all the dead tress we have access to. So sustainability is not an issue. However, the amount of work needed to fell and cut each tree and then transport the wood down to your shelter and stack it, is substantial!
When we bought this ranch, there was no wood shed. The previous owner stored all his wood way down in the pole barn and then every day would fill the bucket on the skid steer (like a Bobcat), drive it up to the house and unload it into the wood boiler.
I rejected that plan as it entails making sure the long driveway is always snow plowed and the skid steer is working! What happens if the skid steer won’t start one day? Too risky for me. No thanks.
So I booked a local semi-retired carpenter to come build us a wood shelter. My daughter’s boyfriend, Keagan, had dismantled my horse shelter down on the coast, loaded the pieces into my horse trailer, and brought them all here. Keagan’s grandpa was a carpenter, so he had grown up doing projects and learning from Gramps.
My old horse shelter that Keagan dismantled
Well, it was the last week of September and the carpenter I had booked let me know that he wouldn’t be able to do the shelter for at least 3 more weeks. That’s cutting it way too close, and I was already nervous that we didn’t have any wood stacked and stored.
So I decided that Keagan, my son Oscar, and his friend Noah would build our wood shelter. None of them had ever built a shelter before. But luckily, I had filmed some of the construction of my horse shelter, and I had learned a few things myself over the years. But mostly, I had faith that building stuff doesn’t have to be so darn precious.
My Dad, my brother, and I built a barn for my horses when I was 9 years old. My Dad is an eye doctor, with zero carpentry training, I was 9, my brother was 10. But that barn lasted the entire 15 years we were in Alberta, sheltered my horses and kept my hay dry every year. It didn’t look so pretty, but it worked just fine!
Other rational adults were shocked that I would hire 3 youths to build my wood shelter, who’d never built a shelter before. Except for Keagan, their experience didn’t extend much beyond Shop class in high school. However, I’m also a fan of learning and experience. Worst case scenario, the shelter collapses and some wood gets squished. No biggee.
Without going into every detail on the journey of the build and all the challenges faced and overcome, here’s a shorter pictorial tour and the highlights of building our new wood shed:
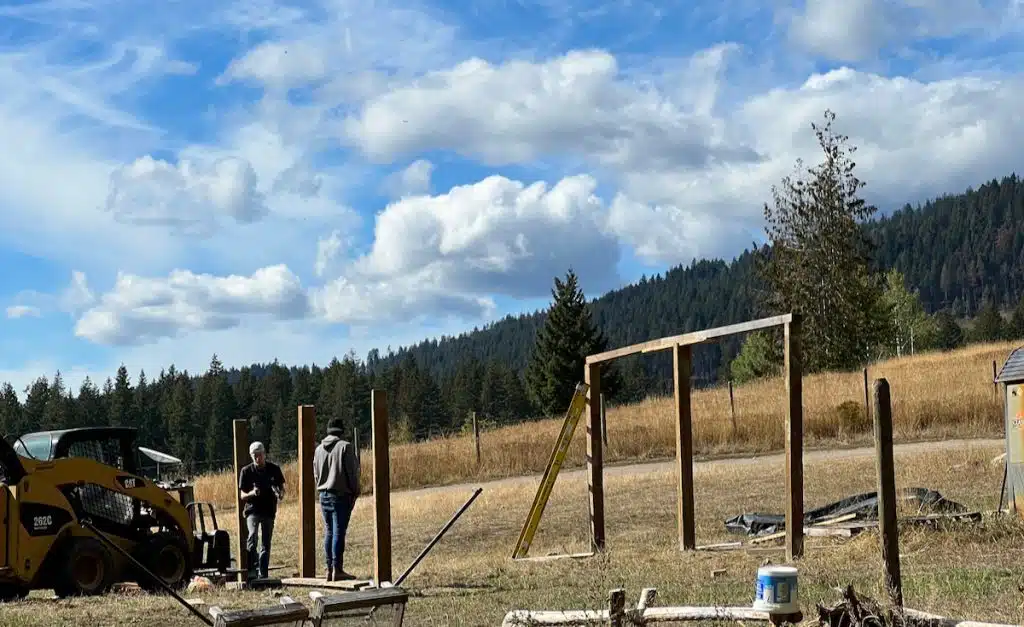
The posts are in and anchored in QuickCrete. Time to put the roof beams on…
I showed Keagan a trick I’d learned for measuring where to put the post holes (so everything is perfectly even) and he commented, “Never in all my school years did I ever think I’d actually use Pythagorean theorem!” When it came time to anchor the posts in QuickCrete, I had a video I’d filmed of a carpenter building one of my horse shelters, that showed us exactly how much water to use and how much QuickCrete. Yay!
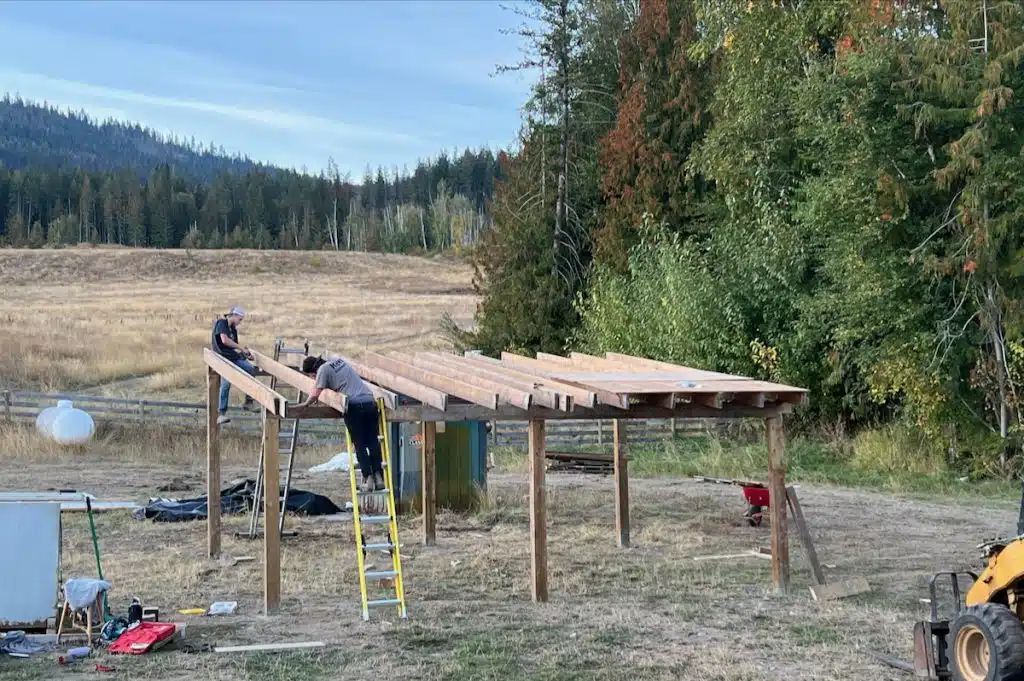
Adding the 2×6″ roof planks. These are 16′ and the shelter is 20′ long
Ooops – Keagan is at the high side, making sure every plank is perfectly even. BUT the snow melt/rain is going to run off the low side – so that’s where we’ll need to attach the drip edge flashing. Never mind, we even them up later using a reciprocating saw – close enough!
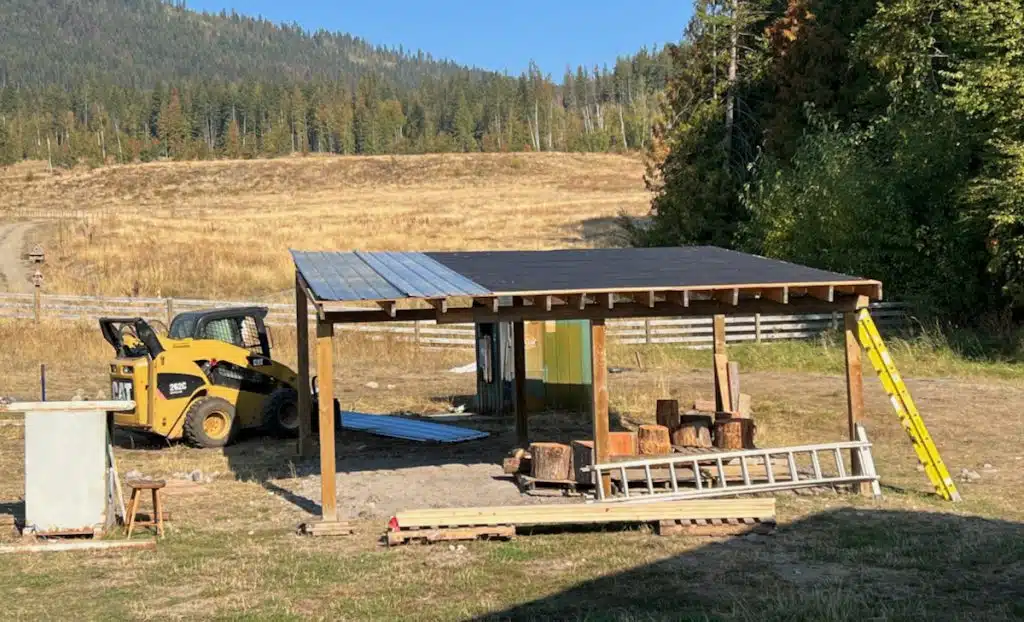
Next is the plywood, tar paper and steel roofing sheets
Once the roof is in place, the walls are next. The normal practice for a wood shed is to use 2×4″ or 2×6″ planks evenly spaced for the walls, with gaps to allow lots of air flow into the shelter. However, the distance between our posts on the back wall did not match the standard plank lengths, so we were going to have to hand cut every single plank. Uh… no. Way too much work. As Keagan and I brainstormed what to do, pictures of old-timey ranch fencing flashed into my mind:
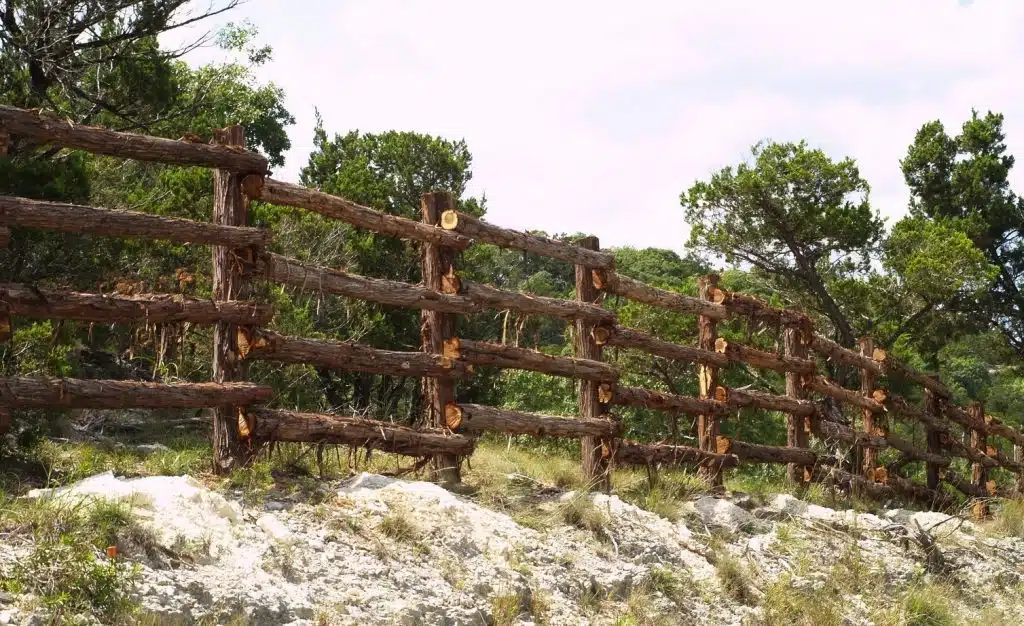
Voila! Let’s just overlap the planks, so we don’t have to cut anything:

Building the back wall and 2 side walls, the front near the wood boiler will be left open
It’s at this point that I have a Hail Mary Moment. I realize that all the water pipes coming from the wood boiler to the house and back again, run underneath this wood shelter. What miracle did my angels wrangle that we did not hit/slice a single water pipe as we drilled 3 feet into the earth for all 6 posts?!! I am gobsmacked and gushingly thankful even to this day.
The bizarre thing is that not only did none of us building the shelter realize this risky pipe situation – but none of the 3 experienced carpenters, electrician, or wood-boiler-owners who stopped by, noticed it either!
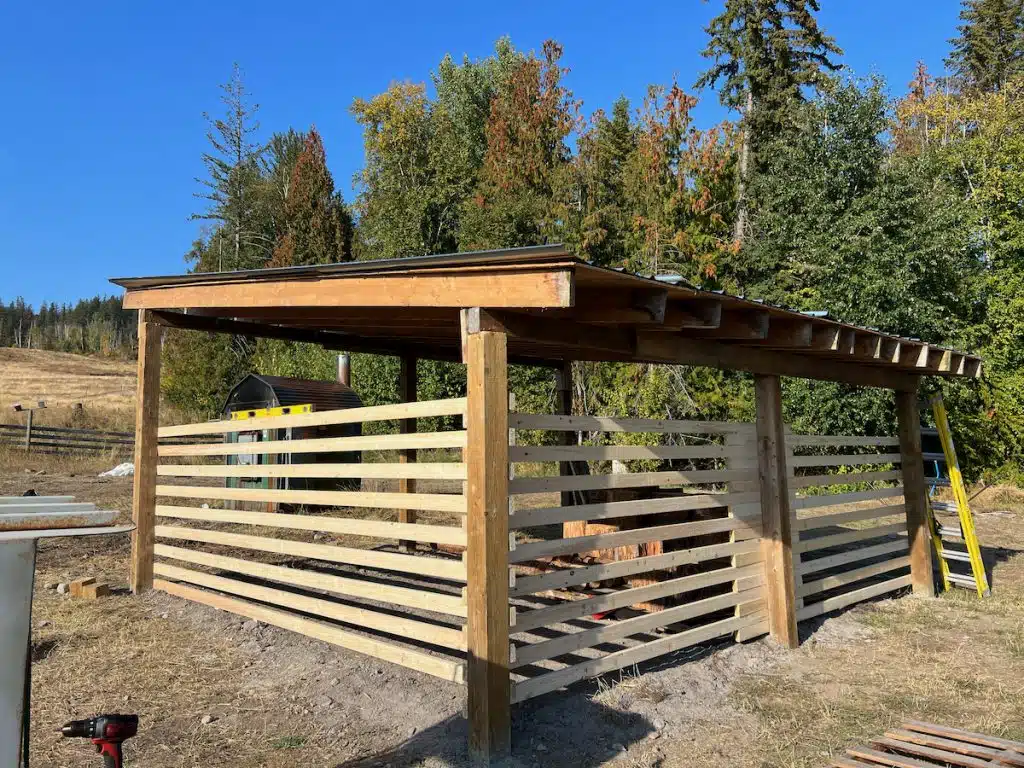
2 walls done, Keagan making sure each plank is perfectly level, and the roofing tin is next after we get the right size drill bit
At this point, our neighbour (who built her wood shed with her husband) suggested we add additional support between the roof beams and also add some cross braces. Then a new friend, who’s a general contractor, stopped by and told us the 16′ width was too wide to support the snow load and 8′ is standard building code. Frick. This shelter was brought up from the coast where it mostly rains and gets very little snow in winter. He suggested we add 3 more support posts through the center of the shelter. Keagan and I discussed this – and for numerous reasons decided to just add one support beam to the center of the shelter.
Again, if this was an animal shelter, I would not take that risk. But as the roof is visible from my kitchen window and I will see it every day as I stand at the sink, we figured if the snow load got too high, I could just head out there and shovel it off. We could always add the 2 end posts next year when we have more time.
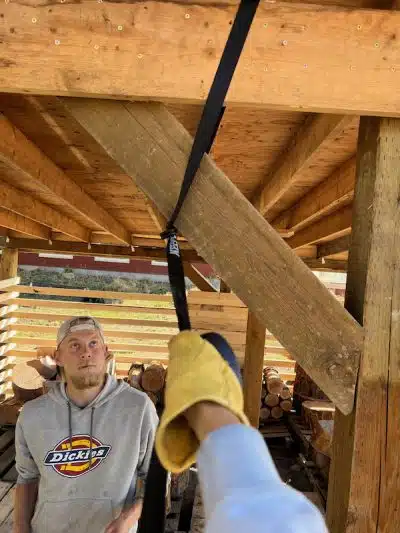
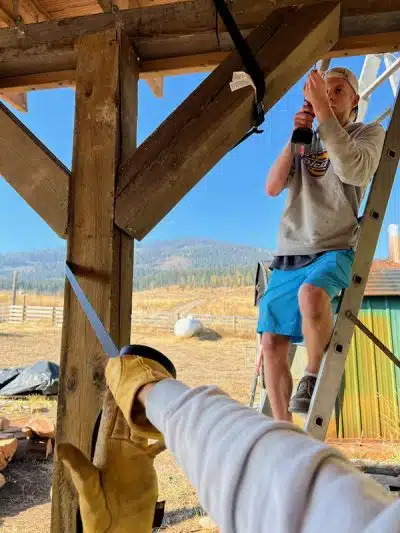
Keagan and I finished up the cross-bracing using the same 6×6″ posts. After Keagan used a skill saw to cut them to size and angle them, he needed me to hold them in place while he screwed them in. However, being that I was working overhead and balanced precariously on a ladder, there was just no way I had the arm/shoulder strength to hold those suckers firm.
As we contemplated what to do (Oscar was still in bed and we really needed to finish that morning) pictures of all the farm machines I’d watched at work flashed in my head and I thought, “Wait, a minute, we humans are masters of leverage. How can I use leverage, instead of brute strength, to hold these braces in place?”
I thought about using rope, and then the ratchet straps in my truck popped into my head. The hooks were the perfect thing to wedge the strap against and I went from struggling and sweating to try and hold the braces (and failing), to being able to hold them snugly in place using one hand:
Seriously, one of my proudest moments right here, coming up with this brilliant hack. AND we’re done!
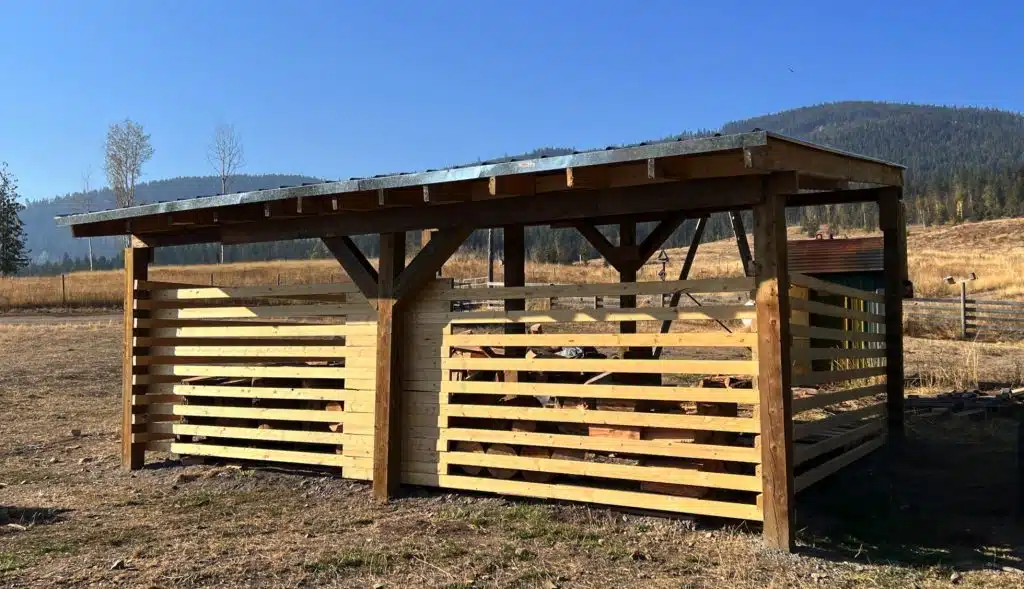
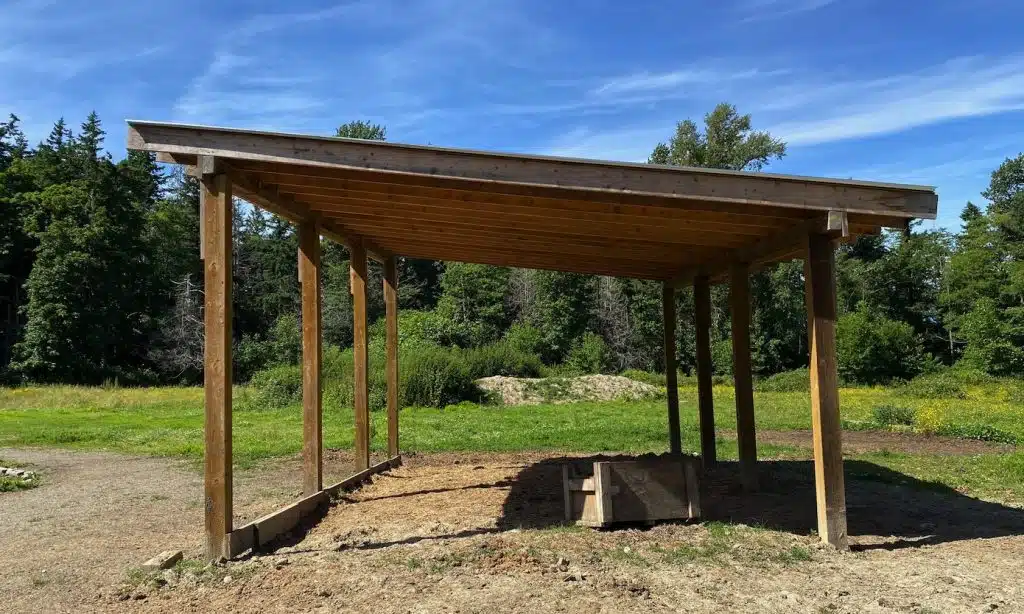
Center support post, cross-bracing, and drip edge added, so melting snow or rain doesn’t erode the plywood under the roof tin
We built this in a week and although the posts are a tad twisted and the roof support planks unevenly spaced, I think it looks brilliant and the lads did such a great job!
As life/serendipity came to the rescue a few times, with skilled visitors showing up at crucial points, we got to experience the blessing of community. In this tech-heavy age, how many young men get to build something useful, substantial, and important with their hands – something that makes a difference to quality of life and actual survival?

My 2 sons stacking the first 2 cords of fir in our lovely new wood shed
By having faith in their ability, and giving them full permission to just do their best, how has this project impacted their confidence, perspective and self-esteem? I guess hindsight will answer that question. But I can tell you, they were well chuffed with themselves. And I’m willing to bet that the next shelter Keagan builds, will be perfect!

2 cords stacked – 10 more to go!
4s Comments
Leave A Comment

About
JINI PATEL THOMPSON
I am. an international bestselling author, health product formulator, horse listener, earth singer, mother, entrepreneur, medicine woman, fungi friend, elephant acolyte and regenerative farmer.
I value friendships, loyalty, community, compassion, authenticity, health, vibrancy, strength, courage and truth-telling. More…
![]()
![]()
![]()
![]()
RECENT POSTS

Finding Your Authentic Self: The Journey to Purpose and Contentment
When Your Own Energy Wrecks Electronics, Cars, Computers – Solutions!
My Father Chose Medically-Assisted Suicide (MAID)
EFT Tapping Script to Increase Financial Abundance
Can you Use ChatGPT to Generate EFT Tapping Scripts?
The Irony of ALL Religions
Co-Creating Reality & Money Using Frequencies
Caramelized Onion Pasta Recipe
Partnership vs Joint Venture – Which is Better?
How to Increase Money Flow to your Biz
Money is a Biofeedback System
It’s Time to Get Creative with Money
Yeonmi Park – Truth or Trauma?
Quest for the Elephant Sanctuary
Can you FEEL Yourself Drowning with MAID Drugs?
How To Make Wild Rose Water & Face Toner at Home
Conventional vs. Organic Bananas – Remove the flower, or not?
The Gorgeousness of Typha latifolia – Cattail!
The Vegan Elephant
The Metaphysical Causes of Childhood Disease
How to Use Starlink to Provide Hardwired Ethernet Ports in Your House
Revulsion, Judgment & Other Triggers as Gateways to Awareness
Crash Course on Regan Hillyer’s Millionaire Manifestation Method
Life Plans & Soul Agreements – Part 2
Cellphone on the Bumper: A Message From the Universe
How to Hardwire Starlink Satellite to Ethernet Cable – No Radiation!
Connecting to Nature is Darned Uncomfortable!
Transcendence Is Not The Point of Life on Earth
Explanation of the 9 Dimensions from Matías De Stefano
A Guide to Overwhelm & Manifesting
Life Plans & Soul Agreements – Part 1
Can I Heal You Without Your Permission?
Oriane asks Jini: Origins | Home & Belonging | Legacy
How Does Animal Telepathy & Mirroring Work?
Guides, Angels & Spiritual Boundaries
Medicinal Mushrooms & Vortexes
Interspecies Evolution – Ginny Interviews Jini
Weed Seeds & Angry Neighbours
Facing Our Prostitute Archetype
Soft Porn Selfies Are Not Female Empowerment
A Seat On The Bus of Life
How Psychic & Spiritual Guidance Works
Why Are You Here – From a Vibrational Perspective?
Epiphany: Don’t Return Home
Healing for Land Rape, Tree Massacre, Destruction
Owning That I Create My Own Victim Experiences
The Paradox of Challenging Experiences
Land Listening: The Art of Excavation
Elephants, Horses, Inter-racial Love & No Regrets
Connect to a Past Life of Positivity & Confidence
Jini’s “GET BIGGER” Newsletter
Sign up to stay INSIDE Jini’s ever-expanding universe


That’s awesome! I grew up with a wood stove for heat, and YES it takes SO MUCH WORK to get all those dea trees and make them usable, and my adult self would absolutely say it is worth it (my child self, spending large sections summer vacation, hauling slug and maggot infested logs in from six acres, might not agree). Your wood shed looks really good, but I hope the wind doesn’t blow rain or snow in. And be prepared to negotiate with wasps on where they can live ;)
Well apparently you have to leave enough airflow for the wood to dry out – so people don’t enclose them. Also wood boilers are less discriminating than wood stoves – you can throw logs in there covered in snow and they’ll burn just fine.
And yes, the waspies – I expect we’ll have the same deal as we’ve had at the barn. Although we’ll likely only have a couple weeks of overlap where I want to stack new wood for next winter, so mostly they can have at it!
Do it Yourself is fun! Congrats on the leverage hack Jini! It is one of the most satisfying thing that we can relish when we get things done using leverage, aren’t they?
Although I tend to forget the time and work that I put into my projects once they’re up and running, I think it is quite therapeutic, though only as viscerally noticeable as our para-sympathetic systems, when we get a lot of different works done on our own!
I’m sure it all played bits and pieces in upping my mood, helping me survive and slowly overcome my anxieties and depressionistic indecisiveness in life at those times…
I feel like a child when showing off such creations to my well-wishers… ;D
Also, learning and using the right tools for the right jobs are just what we need to make our days better!
Thank you Dheepak! And yes, if you enjoy building/creating things with your hands in this way, it feeds the soul and down-regulates the nervous system for sure. As does any form of art, cooking, crafts, knitting- basically ANYTHING creative that is enjoyable. I think it’s important for each of us to figure out what it is that we particularly enjoy, and then give ourselves the gift of time to engage in that activity. 😊